Home Network
You have several computers in your house, and you would like them to communicate with each other, and to the internet through a single internet connection. There are several ways to accomplish this.
Chapter Navigation:
1. Overview
Direct cable connection
This is a direct connection between two computers, and the novice or newbie will normally not use this method. Hence we will not spend a lot of time in this section.
For this you need a crossover cable. This is essentially a USB cable where the 2 middle wires are crossed over so that the computers can talk to each other.
This type of connection offers very secure data transmission from one computer to another. A simpler way to transfer data from one computer to another would be through the use of a flash memory stick (USB stick), or an external hard drive for bigger files.
Although it is possible for your computer to connect to the internet while passing through another computer in this fashion, it is not very practical, and it is used very seldom.
Hub, Switch or Wired Router
In this case, the computers in your house are all connected to a box (HUB, or SWITCH or ROUTER) via a cable, and this box in turn connects to the internet. It is in charge of dividing the internet connection amongst your various computers, as well as making it possible for your computers to talk to each other (A Home Network). Computers would have access to your shared folders and possibly to a printer. This is a fairly secure way to connect to the internet.
Wireless (Wifi)
As the name implies, the wireless connection is just like the wired connection, but instead of connection through cables, your computer now connects to your router through radio waves. Because radio waves can be intercepted, the security is lesser than in the previous examples unless you take the following 2 or 3 steps.
2. Securing the wireless router
There are two steps that should absolutely be taken to secure a wireless home network, and one that is optional.
The first will secure access to the wireless router itself, the second will encrypt the wireless transmissions, and the third will make your wireless router invisible.
Step one
In this step, we will assign a new password to your router.
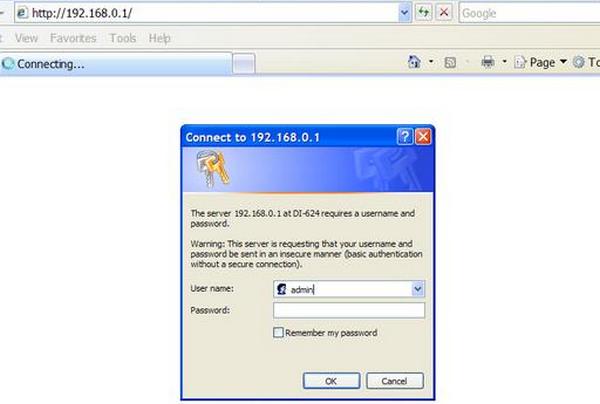
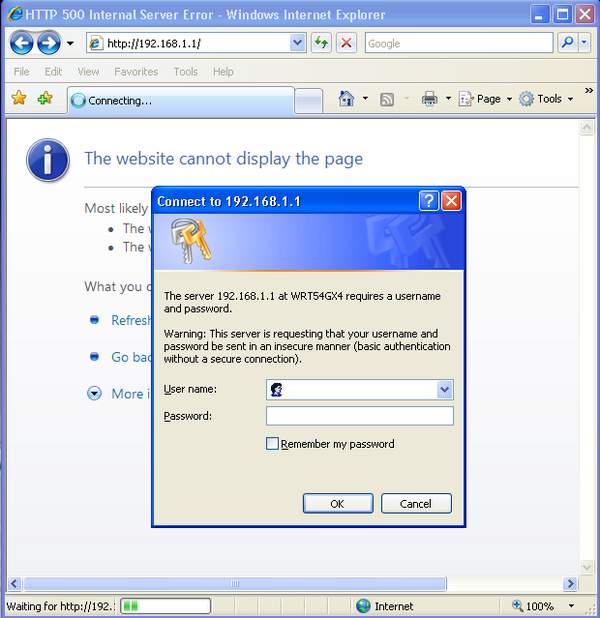
Most routers can be accessed through your browser by typing one of the following addresses in your browser:
192.168.0.1
192.168.1.0
192.168.1.1 etc.
Similarly, most routers have a default user name or password, which in most cases is "admin". If you do not change the default user name or password, then someone using a wireless connection of their own, could have access to your router. This is undesirable.
By entering one of the IP addresses mentioned above in your browser (check with your router information booklet for the appropriate one) , you will arrive at the log-in page of your router
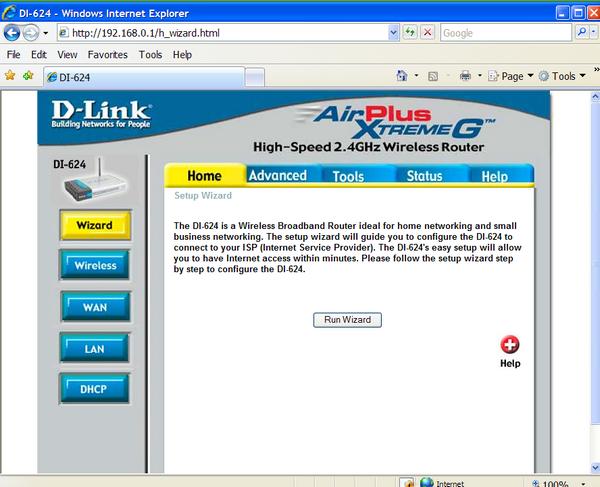
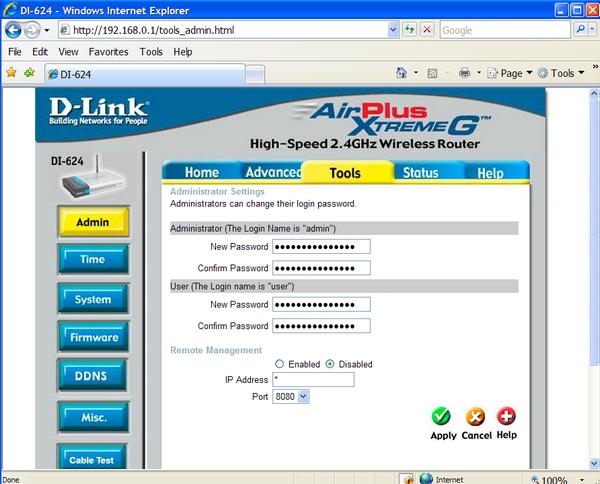
A DLink example:
This in turn brings you to the setup page:
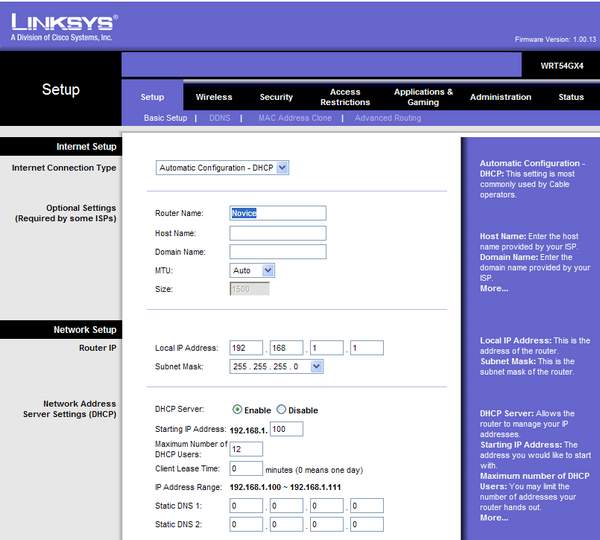
and a Linksys example:
and then setup page:
Consult with your router documentation for the exact procedure.
This gives you access to your router. Next let's go to the password page.
For DLink, go to ADMIN and TOOLS
and for Linksys, go to ADMINISTRATION and MANAGEMENT.
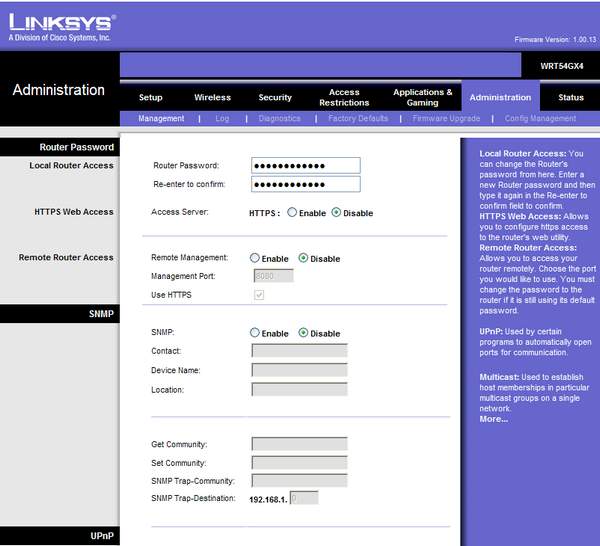
The reason for choosing a password, is so that only you have control over the settings of your router. Indeed some more advanced settings allow you to determine exactly who has permission to pass through the router, and access the internet or the home network, and to what extent.
Step two
In this step we will encrypt the wireless transmissions.
If you live in a densely populated area, and especially in an apartment building, or in a townhouse row, you want to encrypt the wireless transmissions of your computer to and from the internet, or other computers in your home network. This makes your transmissions unreadable to anyone else, and becomes very important when private data is transmitted.
There are usually 2 or more types of encryption, which I listed in increasing security levels: WEP, WPA, WPA-PSK and on newer routers WPA2.
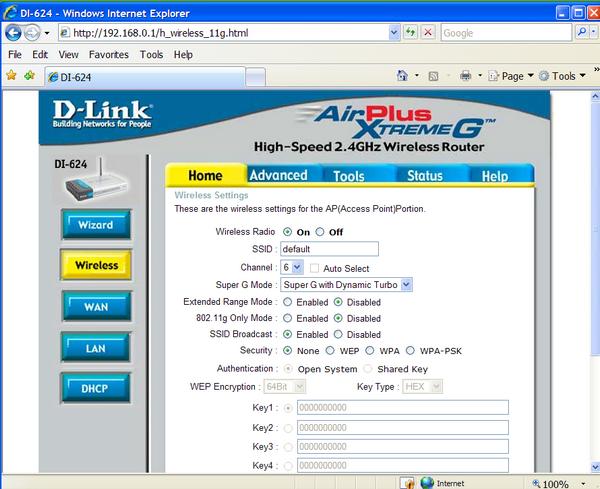
For the D-Link, the encryption settings page is usually found in the HOME and WIRELESS section.
For Linksys you navigate to the WIRELESS, WIRELESS SECURITY page.

WEP encryption usually requires a hexadecimal password (hexa for the first 6 letters of the alphabet, and decimal for numbers from 0 to 9), which varies in length according to the encryption strength that you chose, either 64 bit, or 128 bit. You will have to enter these settings into each of your computers for access to the internet or your network through your router. The WEP encryption remains constant and is tied to the password or the key.
With WPA, you can generally chose any password or key you wish. This is a more secure method provided your password or key is complex enough, because all computers on your network will synchronise, and the encryption itself changes at predetermined intervals on a regular basis.
Step three
Making your router signal invisible.
A router normally sends out a radio signal called SSID. This signal makes the router visible, and tells you it's name. This is very handy in a place where many different wireless signals exist. You can chose to connect to a specific router by name.
Conversely, if you made the SSID broadcast invisible, you would have to know the name you assigned to your router in order to connect to it. The immediate implication is that passers-by would not even know that there is a router. I called this step optional, indeed, if you did step 1 and 2, then this one may not be necessary.
For D-Link:
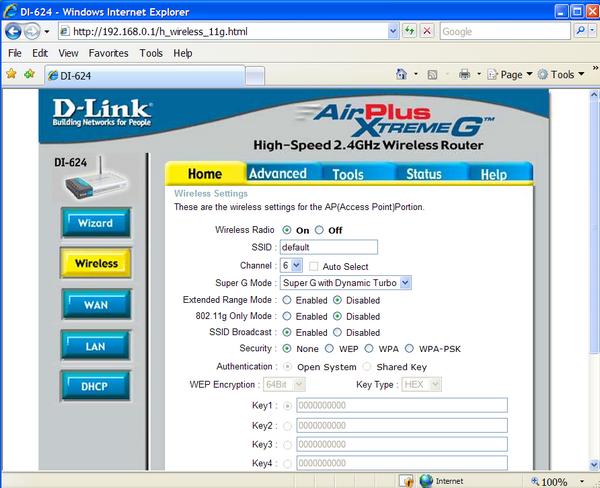
In the illustration above the SSID name is Default. This is where you can assign or change the name of the router, and a few lines below, you can select SSID Broadcast Disable.
For Linksys:
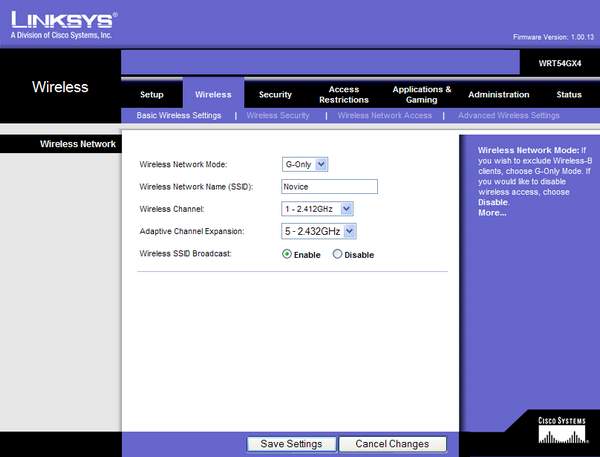
In the example above we called the router NOVICE, and just below is the option to disable the SSID.